Office:- 954-545-2229
Fax:- 954-301-0426
Email:-admin@trevidgroup.com
News, Info & How To’s!

How to Install Tiles on Walls

Prepare Wall for Tiles

  1.  Turn off power to the kitchen, and remove outlet covers and switchplates in the area to be tiled. Tape off outlets, cabinets and the area where your countertops meet the walls. Move freestanding appliances away from the walls.
  2.  Using a level, attach a ledgerboard — a sturdy piece of lumber attached for support. In this case, we are using a straight 1×4 board screwed to the wall studs where you want the bottom edge of the backsplash will be. A ledgerboard temporarily supports tiles until the adhesive cures, keeping them level where there is no countertop.
  3.  Clean walls with a mixture of trisodium phosphate (TSP) and water according to the manufacturer’s instructions. Sand or degloss glossy surfaces.
  4.  Check the flatness and condition of the wall. Fill dents, dips and ripples more than 1/16 inch deep with joint compound. Let dry, sand smooth and prime.

Plan the layout of the tiles

  1.  Find the center of the wall that best suits your tile selection and mark a vertical line. Some tile patterns work best when centered on a focal point, such as the faucet or stove
  2. Dry-lay tiles horizontally on the countertop along the wall using spacers to check the ends. If cut tiles will be too narrow, adjust the layout to allow you to cut wider pieces at both sides.
  3. Check the vertical layout. Cut tiles are best hidden under cabinets, but you may have to cut from the bottom if your countertop isn’t level.
  4. First, use a level to find the lowest point of the countertop. Hold a tile at this spot, accounting for a 1/8-inch expansion gap. Mark the wall at the top of the tile. Then, use a level to extend the line along the work area. This line serves as your cutting guide to fit tile along the counter.
  5. To see where the tile will end at the top of the installation, make a jury stick: Mark a straight board using the tiles and spacers for the vertical layout. Hold it up to the wall to check. If you have tiny slivers of tile at the top, adjust the layout down and redraw your reference line.

Attach the tiles

  1. Mix thinset, or your chosen tile adhesive, according to directions and spread on a small section of the wall with a drywall trowel. It’s important to work in small sections because thinset and other tile adhesives dry quickly. Comb over it with a notched trowel.
  2. Press the first piece of tile into the wall with a little twist, leaving a 1/8-inch expansion gap at the countertop. Press against it with a rubber float to seat it in the adhesive.
  3. Working in small sections, repeat the procedure with additional pieces using spacers to ensure even spacing. If you need to make a cut, mark the tile. For larger tile cuts, set the tile in a tile cutter mesh side up, and score the face. Break each piece along the line. For smaller tile cuts, use nippers.
  4. Let thinset / adhesive dry for 24 hours, then mix grout according to directions.
  5.  Apply grout diagonally across tiles using a rubber float to press it into the joints. Wait 10 minutes, then wipe away excess with a sponge using a diagonal motion. Rinse your sponge often. A slight haze may form, but will clean away later with a haze remover you can buy separately.
  6. Allow grout to dry according to the manufacturer’s instructions, then apply grout sealer according to the manufacturer’s instructions.
  7. Fill the expansion gaps with caulk or silicone sealant.
  8. Add box extenders to outlets and switches to bring them level with the new tile backsplash. Replace outlet covers.
 
Read More...

Developer seeks $83M for student housing at FIU

A developer is asking Miami-Dade County to approve an $83 million bond for the construction of a student housing complex on Florida International University’s Biscayne Bay Campus. 
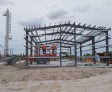
National Campus and Community Development Corp. and Biscayne Properties agreed to lease a 4.75-acre site from FIU and built a nine-story complex with housing for 615 students. It would total 290,000 square feet. At the May 13 meeting of the Miami-Dade County Commission’s Finance Committee, commissioners will vote on whether to let the developer seek funding through the county’s industrial development authority bonds. The advantage for the developer is that it would be tax free.
Read More...

Kick off a new business with a super grand opening

There’s no shortage of items to check off your “to-do” list when you’re in the throes of opening a new business. Particularly for brick-and-mortar establishments, part of this process also includes launching a grand opening event. While there’s no one-size-fits-all formula for making your grand opening a success, there are some best practices — steps you can take to ensure you plan an event that will make an impact and provide you with a good turnout, and most important, awareness that you’re ready to do business.

Go into planning your grand opening with the right mindset

You’ve probably had an opportunity to see or even participate in the grand opening of a business in your area. For every business opening, there are hundreds of ideas that can serve as good ideas for a grand opening. To narrow down your options and identify which idea may be the best choice for your business, get your thinking to line up with your needs.

1. Think of y our grand opening as a themed party

A grand opening is a quick way to cement your brand in the minds of your target audience. Use the event as an opportunity to build your image by choosing a theme that complements your brand.   Read more…
Read More...
Latest project
Categories